Tuesday, January 11, 2011

Making a Signature for Your Blog!!!

Okay so maybe I'm just not very smart, but I have been trying to figure out how to make a signature for my blog for awhile now!!
I was reading somethings on The Blog Guidebook and found a website that will make my signature for me!!
If you have never read The Blog Guidebook you should DEFINATELY go look at it!!
And if you are a dummy like me and you need a signature than check out http://www.mylivesignature.com/

Monday, January 10, 2011

GUEST PROJECT-- Make Feather Headbands with Amy!!

Hi! My name is Amy and I'm so excited to be guest blogging on Ashley's blog today! I am 31, am married and have two beautiful children. We live in Central Indiana (I've been a Hoosier my whole life) and I work as the Sr. Pastor's assistant at our church. I've been creative my whole life, whether that be scrapbooking or jewelry making or sewing - all of which started in High School and then laid dormant for a while. I am the owner and designer at amycornwell.com, I love to create just about anything, so that means that my blog is a mix of all things creative. Sometimes I have sewing tutorials, sometimes jewelry posts, sometimes recipes and sometimes pictures of my family. I'd love for you to take a peek when you get a chance. It truly is a lifestyle blog of all that I'm passionate about. I love to inspire others to create and hopefully my tutorial today will inspire you to create something beautiful!


Today I'm going to teach you how to make this super cute feather headband. It's really easy and costs about $5 to make with many supplies left for other projects! Here's what you need (picture 1 below):


- 1/2 yard black tulle (you'll have lots left)

- black feathers

- black wire-wrapped bead components

- crystal buttons

- felt

- plain headband

- scissors

- glue gun

- wooden skewer or stick


To start, cut two ovals of the same size out of the black felt in the size that you want your focal piece to be (picture 2). Cut a few of the feathers off and glue them to the felt, using the skewer to press it down (picture 3). Trust me, you'll be happy you used the skewer and not your fingers - ouch! Cut a bunch of tulle circles, about 1 1/2" in size. You'll be taking about 3 circles, folding them in half twice making the shape in picture 4.


Glue those tulle pieces on in a random fashion, being sure to press well with the skewer so that the hot glue goes through all of the layers (pictures 5/6). Add a beaded component, cutting off the extra wire at the bottom (picture 7). Keep adding tulle to a little farther than the top half, making sure that you do some sideways on the edges (picture 8).


Add a few extra feathers and another beaded component to lay the feathers down a little (picture 9). Keep adding tulle until you get to the bottom, then add some tulle upside down (picture 10). You'll have a funky spot of glue where all of the tulle comes together, but that's okay (picture 11). Glue on a few crystal buttons and we're almost done (picture 12)!


Here is where you learn from my mistakes. I just guesstimated on where the piece should go on the headband and glued it on. Don't do that! I also had the feathers going up and I looked like a bird. So I took it apart (cutting and pulling with all of my might since the hot glue had already set) and started over. I decided to put it farther down the side and the feathers going down so it's much better. Lesson learned: place it on your head as a test BEFORE you glue it down! Add a dollop or line of glue on the back of the felt and attach the headband (picture 13). Then add a ton of glue to the felt and attach the second oval to the top of it (pictures 14/15). ALL DONE!


I love this headband! I wasn't too sure once I started how it would turn out but it looks so cute on. I can't wait for date night now! Thanks so much, Ashley, for letting me hijack your blog today. I hope you all will stop over to my blog for a peek!


Thanks SO much Amy! These Feather Headbands are super cute and not hard to make at all!!! Amy has an awesome blog at http://www.amycornwell.blogspot.com/ go check her out:) 

Saturday, January 8, 2011

Mini Window Dividers

I have been trying to come up with something to cover up my windows in my bedroom for weeks now,
and I didn't want to use curtains!
I kinda knew what I wanted to put in them but anytime I tried to explain it to anyone it didn't make any sense!
I finally decided I would just wing this project and see how it turns out!
So where do I end up? Hobby Lobby!!
Here's a preview of my finished project:
Cute Huh!?!

The things I eneded up buying:
Foam Board
Fabric (super cute new Spring fabric is out!!)
Ribbon
Quilt Batting
I first measure my foam board out in 3 pieces, each 10 inches wide! Then I took my cutting knife and tore them apart!
I got out my quilt batting and cut it the same size as the foam board,
then I took my fabric and cut it an inch longer and an inch wider than my foam board!

You can barely see those 3 little holes on the left side of the board,
but I cut 3 wholes into the foam board to later run the ribbon through!

Then I took out my hot glue gun and put glue all over one side of the board and stuck my batting on!

Afterwards I took the fabric and laid it over the batting and flipped the board over.
I put glue on the back of the board and pulled the fabric tightly on each side and stuck it down.

I should have cut the holes in the fabric to match the holes in the board but I didn't, oops!
So I felt for the holes and took my knife and just cut through, and thankfully it worked!!!
I measure out 3 pieces of my ribbon and stuck a piece through each hole!
After I finished the other 2 pieces of board I tied them all together, and set them in my window sill and I think they turned out super great!!

I think I'm going to need to add one more board in so my window is fully covered, but at least now everyone in my house knows that my idea worked and I'm not crazy! I just had a little bit of trouble trying to decide what I was wanting to do! Hahaha!!

Thursday, January 6, 2011

FREE ADVERTISING!!

Sara from Sweet November is offering FREE advertising until she reaches 300 followers!!!
Go check her awesome blog out!!!

Monday, January 3, 2011

Kinsley's Tree For Nursery

Trying to fill up all the walls in a nursery is hard work!
THINKING of what to put on all these walls is even HARDER work!!
I had my mind set on putting a tree with some birds on it on one of the walls,
but didn't realize how expensive this could be! And I am not experienced enough with my Silhouette machine to make a tree and print it off myself, so we painted one!!
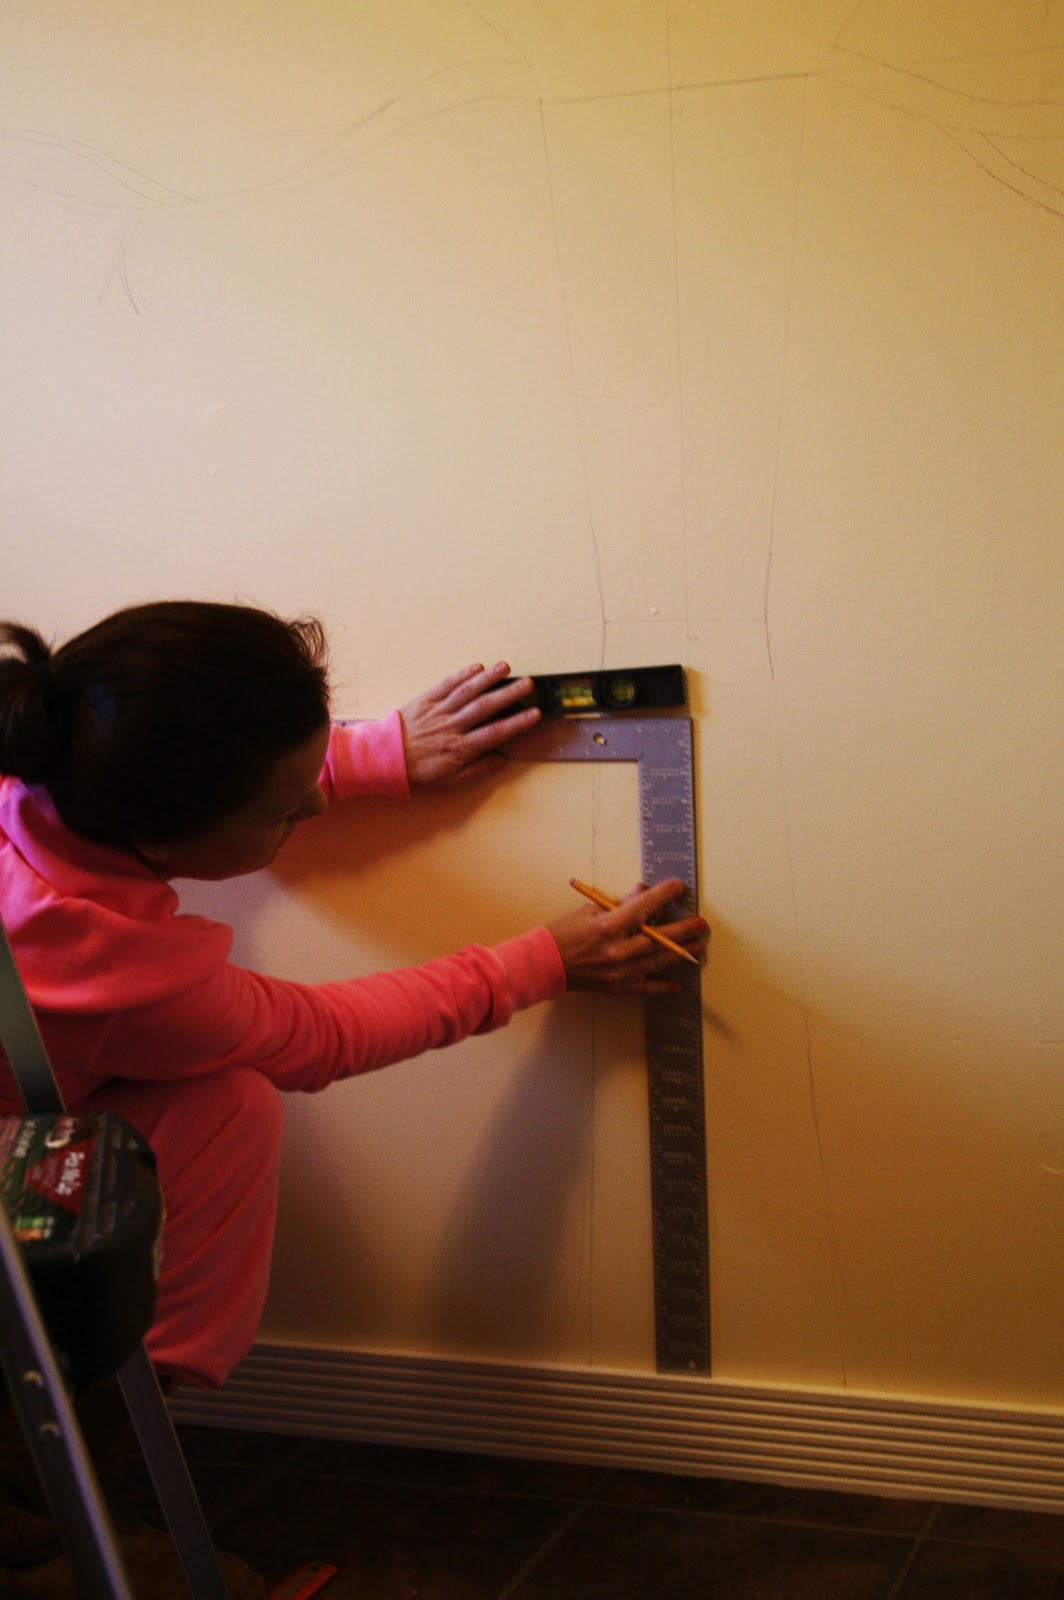
First we had to measure it out, 55x80 is roughly what the dimensions ended up being!
Here's my mom measuring it out:)
She's pretty handy!

Gotta love her hot pink sweats!

Now the painting begins!!
A few weeks ago Home Depot had this AWESOME sale and we got like 20 pints of Martha Stewart paints for $4.95, all different colors! So we used a brown that came in that pack for the tree paint.


Finally my little sister woke up around 2 PM and helped us paint!!
She would sleep all day if we would let her!
But what 16 year old wouldn't??

There's Mom with her thinking face on:)
Behind her you can see the pretty crosses that I spray painted pink a few weeks ago,
I'll do a post about that soon!!

FINALLY 5 hours later our beautiful tree is done!!
Job well done huh?
So then I got on the Silhouette Studio and printed off some birds, owls, and leaves on different colored cardstock! I mix and matched the papers to give all my little animals character!
My first instinct was to modpodge these little creatures onto the wall, then when we actually thought about it a few years down the road when we want to take the things OFF the wall it might be kind of difficult.
So this is what we used:

After I applied this adhesive spray on the back of my creatures I started sticking them in place!
My fingers got super sticky after spraying this stuff so I had to use a ruler to push down the birds so I didn't get them dirty!


How cute is that owl??

Here is what I thought was the finished piece..

Then I thought that my tree needed some more leaves to fill it in!!
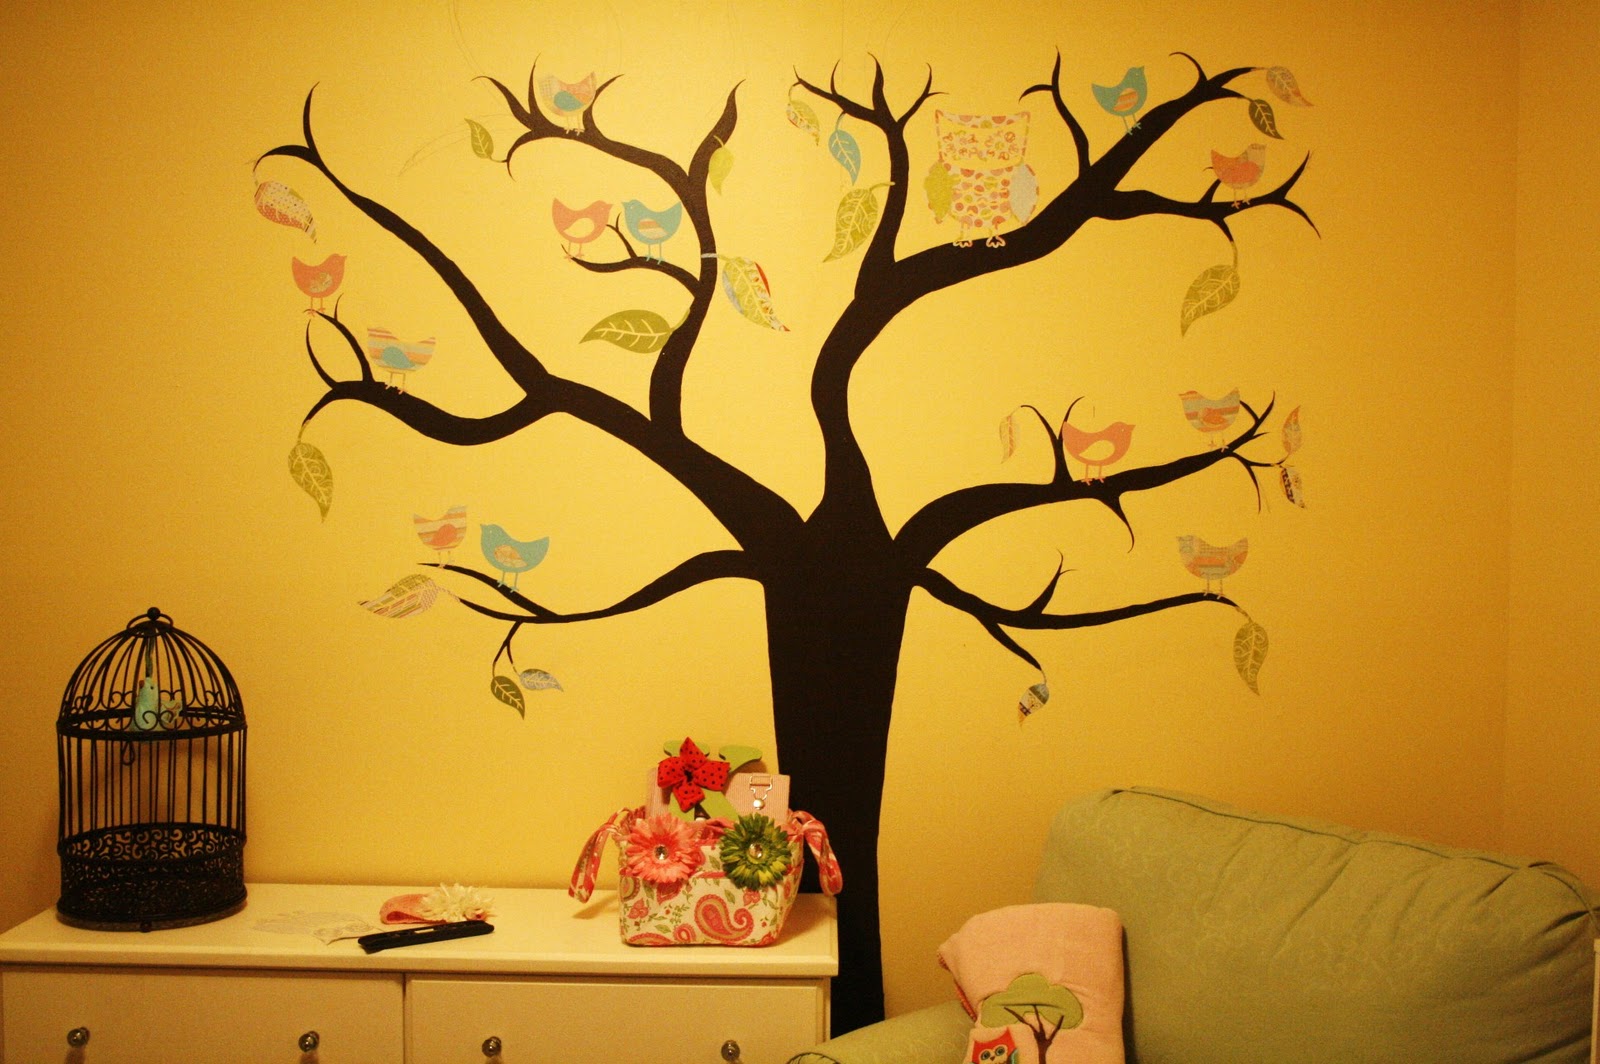
And HERE is my finished piece!


I am so very happy with this finished project!!
So this project cost less than $20!! Go us!!


Sunday, January 2, 2011

Christmas at Granka's!

This Christmas everyone on my mom's side decided to go to our Granka's!!
Granka is what we call our grandmother, when the oldest cousin Micah was little he came up with that name and it just kinda stuck with her!! I think he formed it from Grandmother from Arkansas haha.
Well now she lives in Allen, TX, so we had about a 5 hour drive from Arkansas on Christmas Eve.
Our car was packed, it was me, mom, my sister and both of our dogs!!
And we don't have little dogs!
haha the golden-doodle on the left is our puppy Sammy! And the Lab Mix on the Right licking his face is our dog Charlie!!! He's like my other half:) The little malti-pom in the middle is Millie-Mae, she USED to be our dog, but my mom gave her to my Aunt Lori (the lady snoozing on the couch).
Sadly these weren't the only 3 dogs with us this weekend!
My other Aunt Shawn brought her lab, and my Granka has 2 poodles! It was a bit hectic in the house all weekend!!

He loves his little sister Kinsley already!

This is a closer look at crazy Millie!

Sweet Charlie!

This is my cousin Zachary! He is my absolute best friend, we grew up together, more like brother and sisters than cousins.

This is my Aunt Shawn and Uncle Matt!
Aunt Shawn and her husband came down from Katy, TX!!
Their daughter Meagan couldn't come because she had to work:( And their other son Micah couldn't come because he was still in Iraq on Christmas, BUT he made it back to the states safely yesterday!!

This is my beautiful mom:) One of the only things she wanted for Christmas was a bottle of Hello Kitty Wine, and she got it!!

Here's our puppy Sammy, and my Aunts dog Sophie and our pup Charlie!

Isn't she so cute:)

Here's my little sister Abbey and Charlie

And here is the famous Granka!!!!

She might kill me for putting this on here, but this was the only close up I had of her:/ This is my moms other sister Lori!! She lives in Arkansas too:)

Hope everyone had a great Christmas and a Happy New Years!!!


So I'm Gonna Enter!!

If you haven't heard yet Sew Dang Cute Crafts is hosting Crafting With the Stars!!


I gutted up and decided to enter in!
I'm going to enter my Christmas Wanna Be Mantle !!

Here are some preview pictures!!! 
Everyone should go check out her site and enter up!!
GOOD LUCK:):)