Pages

Thursday, April 28, 2011

Here Lately

Things have been a little hectic lately, and I have been a HORRIBLE blogger!!!
So... Let me catch you guys up on what been going on!
I gave birth to this beautiful  baby girl on February 24, 2011.
I went in the hospital early that Thursday morning ready to get my epidural and have a C-section.
Turns out, an epidural wouldn't work on my back due to a previous back surgery years ago so they had to put me to sleep.
Since they were putting me to sleep, nobody could go back with me:(
So they roll me back into the room with all the nurses and doctors and I was FREAKING OUT to say the least. They had to give me some anxiety medicine because I was so worried I was going to wake up in the middle of surgery. Well they put me down with just general anesthesia, and about 20 minutes later they woke me up and put Kinsley in my arms.
The pain was SUPER bad because they couldn't give me any pain meds when they put me under because they could've hurt Kinsley.I was in so much pain from them cutting my stomach open I didn't even want to hold her so I gave KM to my mom until my pain meds kicked in. 
She was 6 lbs 11 oz and 18 inches long, and completely beautiful. It is definately true when people say it is love at first site, it was unreal how much love I had for her and she was only minutes old!
I was determined not to stay in the hospital very long so that night I told my nurse I wanted to get up and walk around so I could start earning some strength back, it was pretty difficult, but like I said I was determined!
I got to leave the hospital that Saturday and Kinsley was down to about 6 lbs, she had a pretty bad case of jaundice BUT we fought it and now she is 10 lbs at 9 weeks!!!
I'll show you guys some pictures of our journey the past 9 weeks.
Here she is at 4 days old.
This was her first bath I got to give her at home!!
Kinsley Mae at 5 days old, so alert!!!
We are still in the hospital in this picture, her little bandaids on her hands where her iv's were:(

2 weeks old! She is SUCH a happy baby!
Good Morning!!
1 month old!

5 weeks!!

Smiling at her mommy!

All smiles!

9 weeks!!

To say the least I am a little obsessed with her and take pictures CONSTANTLY!! I am so happy to finally have everything organized (well organized enough for right now) so I can get back in blogger world!! I hope all of you have had a great past 2 months!! If anything exciting has happened PLEASE fill me in on your lives while I have been absent!!! Miss you guys!!!


Thursday, February 17, 2011

Guest Post!!!

Hello again Lovely Being Grown Up readers!!

I am very much excited to be blog swapping once again with the lovely Ashley!


Remember me from this guest post?

If not, I'm Kassi from Truly Lovely!

You can read more about me and my blog at that link up there. :)

Truly Lovely


If you're really missing your daily dose of Ashley, you can give her a visit over at my blog today, where she's sharing a lovely tutorial of her own! :)


Today I would like to share a SUPER EASY fleece blanket tutorial with you!!


The materials needed are:


3 yards of fleece fabric


1 package of coordinating satin blanket binding


Coordinating yarn


Coordinating sewing thread

Pins


Yarn Needle


Scissors


Sewing Machine


Photobucket


In this case I went with zebra fabric and all red coordinating materials.


First trim your fleece fabric of any uneven edges or those funky white labeled edges... You know what I'm talking about... :)


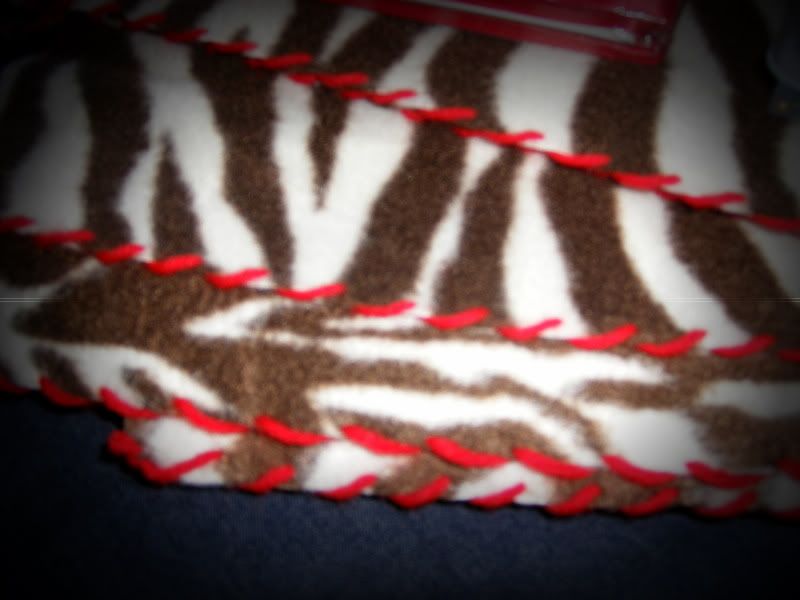
Then, using the Yarn Needle, stitch your thread down the two length sides of your fabric like so... I spaced each stitch about a half an inch apart...


Photobucket


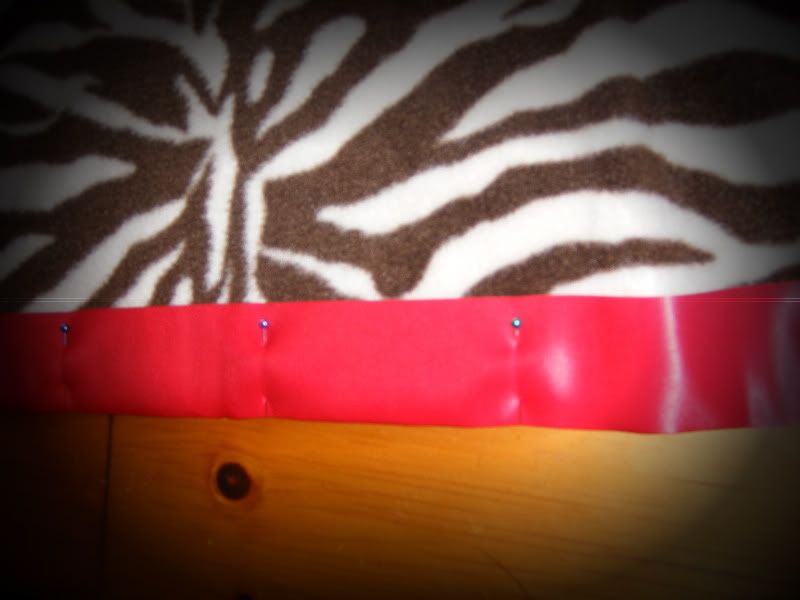
Next you'll pin and trim your satin binding to the two width sides (the two shorter sides)... The binding will have a fold down the middle, simply line that fold up with the edge of your fabric, making sure it's centered so there's an even amount of binding on both sides...


Photobucket


Fold over the edges of the binding to make your four corners and pin those as well. You can either trim or fold the extra binding inside to make your corner.


Photobucket


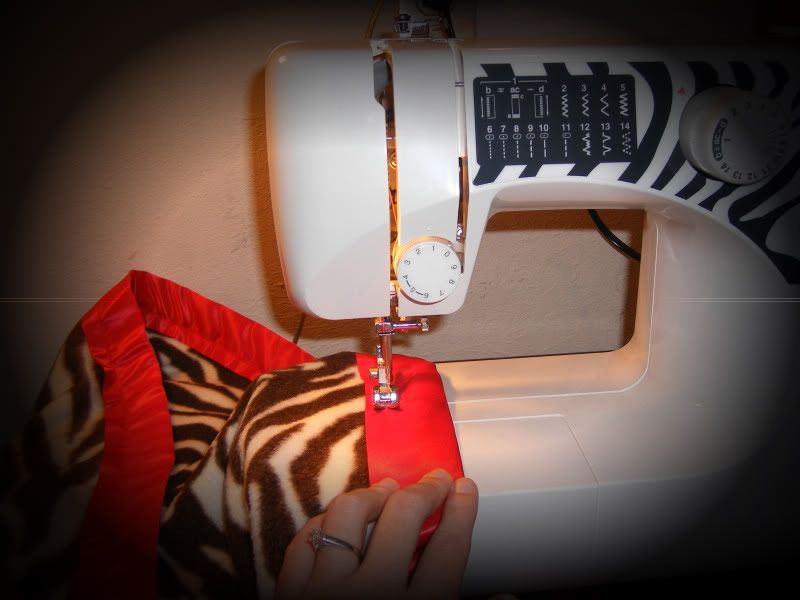
Once you have the binding pinned onto both sides, get out the sewing machine. I used red thread to match the binding...


If you sew really well, you can use a varying color of thread for added pop!!! I don't so much... SO matching thread hides my inexperienced sewing skills. :)


Photobucket


Simply sew the binding to the fleece pulling pins as you go.


And TaDA!!!! A SUPER EASY fleece blanket made by you!

They make great baby gifts, or gifts for friends or family!! :)


Photobucket


Photobucket


Hope you enjoyed my tutorial!!


I would love it if you would pop over to Truly Lovely to say hi!

AND if you like what you see we would LOVE a follow! :)

Hope to see you there!!


THANKS SO MUCH TO THE LOVELY MISS ASHLEY OF BEING GROWN UP 

for blog swapping with us today!!!

SO NICE TO BE HERE AGAIN!!! :)


Special THANKS to the WONDERFUL Miss Kassi for coming over and sharing with us today!! Everyone be sure to check out her lovely blog!!! I am posting over there today and will be over there again in the future so you should go over to her blog and become a follower so you never miss either one of us! Hope you all have a fabulous Thursday!!!


Friday, February 4, 2011

Door to My Heart.. Well the Window Screen to My Heart

Happy Happy Valentines Month!! It took me FOREVER to figure out what to do for my first craft for the big American Crafters competition! But I finally figured it out!! My competitors are very very talented!! So lets hope my craft gets lots of votes:)
Supplies:
Window Screen
Pink and Red Acrylic Paint
Scissors
Tape
Paper
I used the paper as a cutting edge! I cut a heart out of the paper and taped the paper to the Window Screen and cut it out! I cut one big heart, one middle sized heart, and one smaller heart!! 
HUGE NOTE: WEAR GLOVES! That stuff stinkin' hurts when it cuts you!  

We had ONE sunny day this week so I decided I would spray paint, and it was a MAJOR FAIL! This is when I started freaking out a little bit, since I only had like 3 days to come up with and finish my craft for this competition!
 So you need to stick with acrylic paint!! Also place the heart on something like aluminum foil so the paint sticks to the heart better!! 

So now you just let your 3 hearts dry for a bit!
Then your going to stick them all together!! I used some thick double sided tape so it gave the hearts a little 3D look! 
 
Then I just stuck it to the front door!!
Pretty Cute huh!?! I haven't seen anyone in bloggy world do something like this before (and if they have don't tell me haha I was proud to have come up with this on my own!)
So how do you guys like my first craft for the competition!?! Hopefully its as good as my fellow competitors! Everyone needs to head over to American Crafters and vote on your favorite craft!!
I won't pressure you to vote for me hehehe but you know I'd love your vote:)
Oh yes and if anyone was wondering.. only 25 more days until my Kinsley Mae arrives!! Hip Hip Hooray!

Monday, January 31, 2011

American Crafters

Heyy followers! I got some great news this morning, I made it in the top 15 of the American Crafter competition!

Every week I'll be entering in a new craft for the competition so EVERYONE needs to go check it out!!
This weeks theme is Valentines Day!


I am about to start my craft so wish me luck!!

Saturday, January 29, 2011

Nursery Projects!!

I am FINALLY done with my nursery, and only 32 more days until my Kinsley is here!!
So here are some updated pictures of my nursery and a few small tutorials on how I did somethings!

I got this cute birdcage 50% off at Hobby Lobby a few weeks ago, and bought that cute little bird to go inside of it!!

Those are some of the crosses I spray painted pink!!
That super cute bow holder I made just a few days ago!! SUPER easy!
Just bought an old frame from the resale store down the street and took out the middle in it!
Then I painted the frame blue (it was too cold outside to spray paint), and I used a stapler and stapled the chicken wire to the back of the frame!
Most of these bows just clipped on and the ones that didn't I clipped on with a clothes pin!
Here's a closer look!
Here is a picture of the diaper wreath I made for the outside of the nursery door!
 
If you haven't made one of these, they are super easy to make!!
Just get a wire wreath, diapers, tulle, and ribbon!
Wrap the diaper around the wreath and tie a ribbon around it!
Then I took the tool and weaved it in through each diaper, I also used the pink tulle to make the bow for the top of the wreath!!
I got the K from Hobby Lobby awhile back and just hung it by a piece of ribbon as well!
 
 
That's all the pictures I took for now! I'll upload some more later!!
I'm just glad its all coming together so perfectly!
Now I just need a little girl to put in that room!!!

Tuesday, January 25, 2011

Guest Post!!! Making things with Chalk Paint!!


Heyyy followers! I am so happy to have Miss Madigan with us today to show you these awesome Chalk Paint ideas!!! I absolutely love them!!!

Hello Being Grown Up readers!

I am Madigan and I blog over at Madigan Made. I enjoy sharing simple ideas for crafts, recipes and decor with my readers. 
madigan avatar 


I was flattered that Ashley asked me to guest post over here. For this post, I wanted to share with you two chalkboard ideas.
I love chalkboard paint!


First, I wanted to show you these little colorful frames. They were a quick project I made for a craft fair I went to last November.

I picked up several small frames on clearance and spray painted the frames in fun colors. Then, I sprayed the glass in each frame with a few coats of chalkboard paint. (Tip: follow the paint directions carefully for curing time and how to 'season' the board with chalk before use.)

The frames felt like they still needed something, so I adhered coordinating paper to the back of flat glass gems (Read this post for tips how). I glued the gems to the corners.

I thought they were kinda cute.  You could display a fun quote or message somewhere (kitchen, bedroom, office etc).  

I also made a large chalkboard for my kitchen in the dining area. I love having a great quote near me while I work in that room.

I change the chalkboard quote (and decorations) out once a month and share it with my readers.


This BIG chalkboard is by far one of my favorite projects from the past year.  If you wanted more details about the chalkboard and monthly changes, read this post.

Thanks so much, Ashley, for the invite to post here!

Smiles,
Madigan

Isn't she amazing readers?! Those are the cutest ideas ever! I just made some and I plan to post some pictures here soon when my paint finishes drying!!! Be sure to go check out her blog!!

Thursday, January 20, 2011

Million Dollar Spaghetti

Million Dollar Spaghetti is my family's FAVORITE meal, so I thought I would share it with all of you!!
Ingredients
1 lb. of Ground Beef
1 can of Spaghetti Sauce
8 oz of Cream Cheese
1/4 cup of Sour Cream
1/2 lb. of Cottage Cheese
Whole Stick of Butter
8 oz. of Noodles
Bag of Sharp Chedder Cheese

First: Go ahead and put your over on 350! Boil those noodles!! While they are boiling go ahead and mix up the cream cheese, sour cream and cottage cheese!!
Make sure that it is mixed up VERY well!
Then.. go ahead and cook that meat!
 
Make sure its good and brown and drain it!
Then pour your spaghetti sauce over it!
 
Take a few slices of your butter and put them in the bottom of your casserole dish,
Then layer HALF of the noodles in the bottom of the dish!
Pour that nicely mixed up creamy mixture on top of the noodles.
and SPREAAAAAD it all over!
Then add the rest of your noodles and put a few slices of butter on top of those noodles.
Now pour the red sauce and meat on top!
and once again SPREEAAAAD
Now place that awesome casserole in your oven for 30 minutes!
After those 30 minutes take the dish out and pour some chedder cheese on the top and put it back in the oven for 15 minutes!
Then your DONE!
Now I'm awful and didn't take a finished project picture, SORRY!
But the amazing taste will make up for it:)